Building an Intelligent AI Chatbot Using Chat Squeeze: A Step-by-Step Guide
- Yaheli
- Nov 25, 2025
- 3 min read
Creating a custom AI chatbot for your website can transform how you engage visitors, answer questions, and capture leads. Chat Squeeze offers a straightforward way to build a smart chatbot tailored to your business needs without requiring advanced coding skills. This guide walks you through the essential steps to create a free chatbot using Chat Squeeze, helping you deliver quick, accurate, and friendly support to your website visitors.
Sign Up or Log In to Chat Squeeze
Start by creating your free Chat Squeeze account. You can sign up quickly using your Google account or with an email and password. The platform uses Supabase for secure authentication, ensuring your data stays protected. Once logged in, you’ll gain access to your dashboard where you manage all your chatbot projects.
Create a New Bot in Your Dashboard
From your dashboard, click the Create New Bot button. Give your bot a clear, descriptive name such as “Support Bot” or “Store Assistant.” This helps you organize multiple bots if you plan to build more than one. Chat Squeeze will automatically generate a unique Bot ID for your new chatbot within your workspace, which you’ll use to manage and embed the bot later.
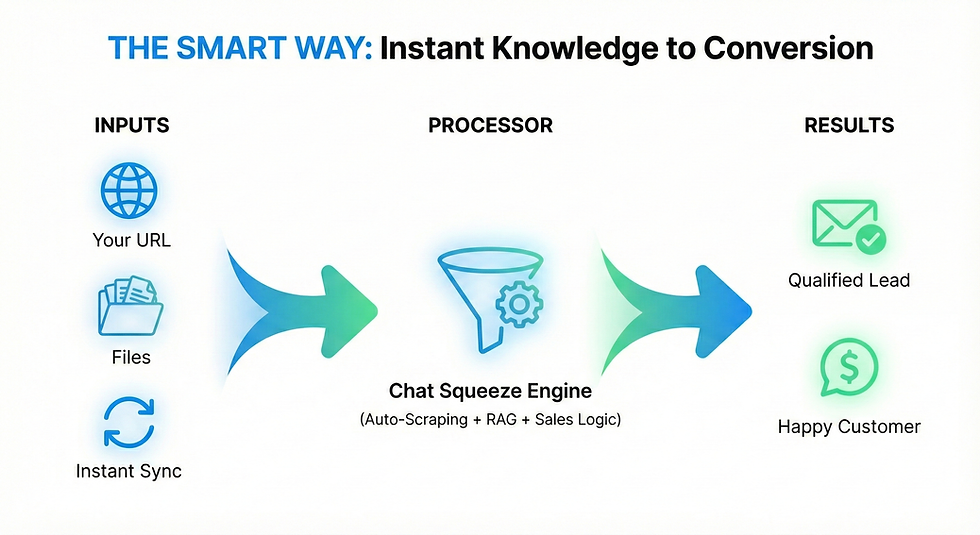
Add Your Knowledge Sources
Your chatbot’s intelligence depends on the information it can access. Chat Squeeze lets you add multiple types of knowledge sources to teach your bot about your business:
Website Pages (URLs): The bot crawls and indexes your website content automatically.
Files: Upload documents like PDFs, CSVs, or DOCX files containing product info, manuals, or FAQs.
Files: Upload documents like CSV, XLSX, or TXT files containing product info, manuals, or FAQs.
Manual Text / FAQs: Enter specific question-and-answer pairs or internal notes directly.
Set Instructions to Guide Your Bot’s Behavior
To keep your chatbot on-brand and helpful, define clear instructions in the system prompt. For example:
“You are a helpful assistant for [Brand Name]. Always answer based on our website and documents. Keep responses short, friendly, and on-brand.”
These instructions help the AI understand how to respond, maintain your brand voice, and avoid making up information. This step is crucial for building trust with your visitors.
Customize Your Chatbot Widget Design
Make your chatbot feel like a natural part of your website by customizing its appearance. Chat Squeeze lets you adjust:
Bubble color, name, and welcome message
Chatbot logo and colors
Chat position on the screen (bottom-right or bottom-left)
Language settings (LTR is Default - RTL for Hebrew and Arabic)
These options ensure your chatbot matches your website’s look and feel, providing a seamless user experience.
Enable Advanced Features for Better Interaction
Chat Squeeze offers several features to enhance your chatbot’s functionality. You can toggle each feature on or off depending on your needs:
AI Suggested Messages: Automatically generated quick replies that help visitors get answers faster.
Keyword Buttons: Clickable shortcuts triggered by common terms like “pricing” or “shipping.”
Lead Capture: Collect visitor information such as name, email, phone number and up to 5 custom fields directly within the chat and get automatic emails whenever you receive a new lead.
These features improve engagement and help you gather valuable customer data without interrupting the conversation flow.
Test Your Chatbot Before Launch
Before embedding your chatbot on your website, use the built-in chat tester to simulate real conversations. This lets you check if the bot responds accurately and naturally. If you notice any odd or incorrect answers, refine your data sources or update the system prompt. Chat Squeeze retrains the bot instantly, so you can quickly improve its performance.
Embed Your Chatbot on Your Website
Once you’re satisfied with your chatbot, it’s time to add it to your website. Click the Install Widget button in your dashboard, copy the short `<script>` code provided, and paste it just before the closing `</body>` tag on your website pages. This simple step activates your chatbot, making it live and ready to assist your visitors.
What are you waiting for? Get started now